Uh-oh, looks like your cart is feeling a bit lonely!
Comprehensive Guide: Installing a Freestanding Bathtub in 8 Simple Steps

Incorporating both style and practicality, a bathtub is a cherished addition to most Australian households. Whether opting for a classic built-in design or a contemporary freestanding model, families across the country value the aesthetic and functional benefits a bathtub brings. While the timeless built-in baths continue to find favor, our analysis reveals a growing preference for the elegance and versatility of freestanding bathtubs.
Considering this trend, we’ve curated valuable insights from manufacturers and consulted experienced builders and plumbers. In this article, we’re excited to present essential guidelines for successfully installing a freestanding bathtub. It’s important to note that engaging a professional for the installation is still our strong recommendation.
Considering this trend, we’ve curated valuable insights from manufacturers and consulted experienced builders and plumbers. In this article, we’re excited to present essential guidelines for successfully installing a freestanding bathtub. It’s important to note that engaging a professional for the installation is still our strong recommendation.
Pre-inspections are always important
- Installations without pre-inspections will void the warranty
- Do not install the bath until a thorough inspection and water test has been completed
- Check the bathtub for the correct model and size
- Carefully inspect the tub for any damage (i.e., chips, scratches, cracks)
- All pre-installed parts must be checked and re-tightened before installation
If you find any problem, you need to contact the retailer and never presume everything is fine.
Installation steps
Ensure the floor is clean and level before proceeding with installation.
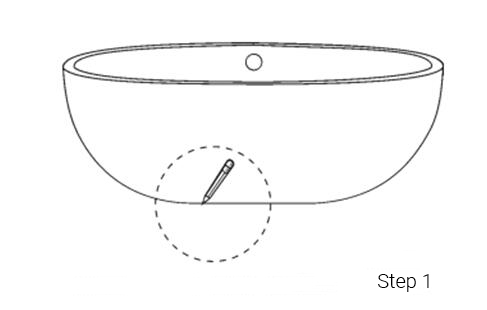
Position the unit precisely where it will be installed on the floor, and then use a pencil or any erasable marker to trace the outline of the bathtub.
Position the unit precisely where it will be installed on the floor, and then use a pencil or any erasable marker to trace the outline of the bathtub.
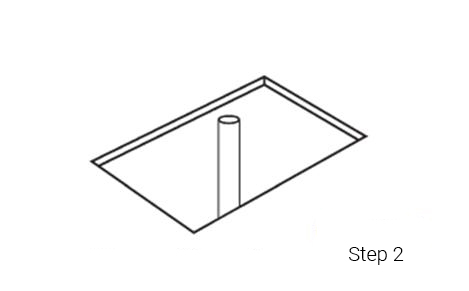
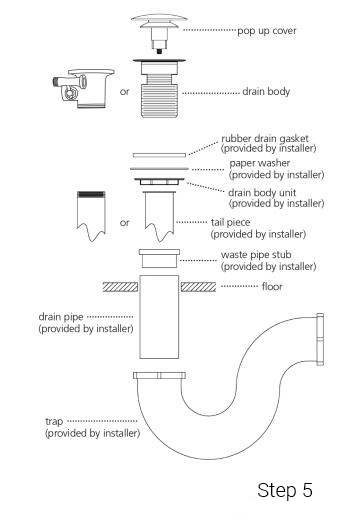
Find the drainpipe’s location on the floor by measuring the drain and waste placement beneath the unit.
To ensure stability during drain installation, gently place the unit on its side using a blanket, cardboard, or another clean protective surface. Clean the area around the drain hole, ensuring it’s dry and free from debris, in readiness for installing the drain.
To ensure stability during drain installation, gently place the unit on its side using a blanket, cardboard, or another clean protective surface. Clean the area around the drain hole, ensuring it’s dry and free from debris, in readiness for installing the drain.
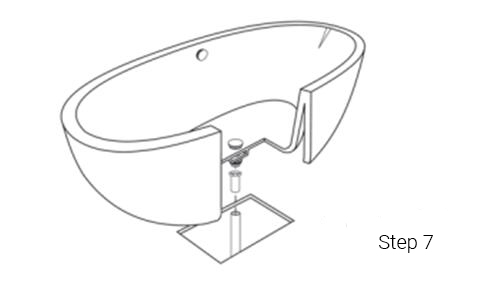
Install the drain hardware:
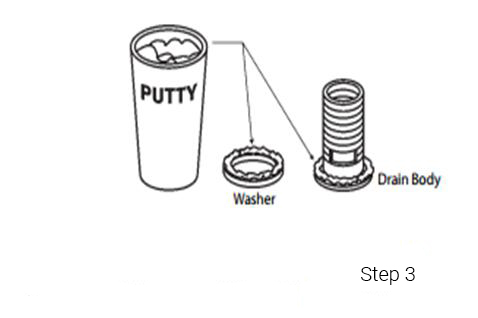
— Seal the Drain Body: Begin by applying a thin layer of clear silicone or plumber’s putty around the drain body. Then, insert the drain body through the designated drain hole.
— Prepare the Washer: Coat the washer with plumber’s putty, ensuring a good layer covers its surface. Next, gently position the washer over the lower section of the drain body.
— Position the Paper Washer: Slide the paper washer onto the drain body, making sure it’s securely in place.
Attach the drain body nut on the drain body and tighten until the nut and washer have created a seal with the bottom of the bathtub.
— Just remember not to tighten it excessively.
— Just remember not to tighten it excessively.
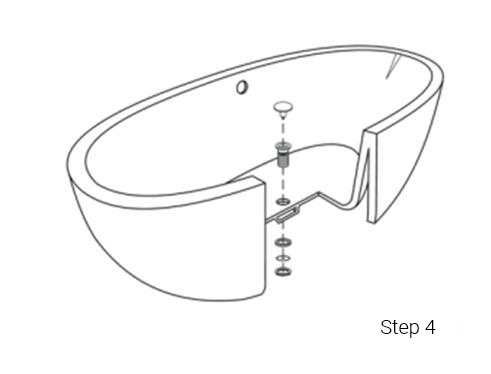
Prepare Tailpiece
— All parts involved in tailpiece are provided by the installer;
— Drain waste vent must always be installed according to the local standards;
— Verify the placement of the bathtub before drilling the hole for the drain waste vent;
— Install 1½ rubber slip gasket over the drain waste vent;
— Cut tailpiece to the desired length (will vary for each installation);
— Slide tailpiece nut over tailpiece towards the flanged end;
— Connect tailpiece assembly to waste vent;
— Place the flange washer on top of the tailpiece.
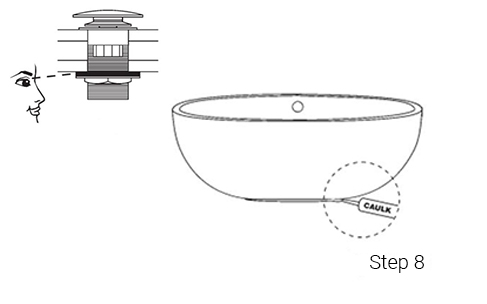
Start to install a bathtub
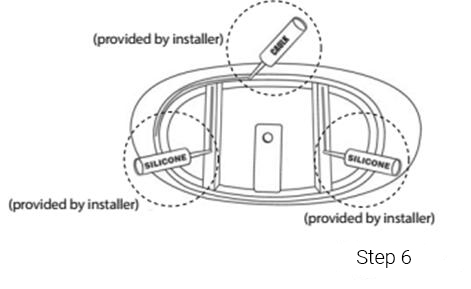
Apply a generous bead of adhesive or silicone to the bottom of the tub supports. Then apply a bead of tub and tile caulk around the edge of the base.
Apply a generous bead of adhesive or silicone to the bottom of the tub supports. Then apply a bead of tub and tile caulk around the edge of the base.
Carefully set tub into position and connect the drain hardware (previously installed). Finish the installation of the tail-piece installation.
Complete Bathtub Installation
Fill the tub with waste to the overflow and then drain the tub while inspecting the waste connections below the floor for leaks. Access from below will be necessary for this step. Run a bead of tub and tile caulk around the bottom edge of the bathtub where it meets the floor. Wipe off any excess caulk with a wet cloth.
Fill the tub with waste to the overflow and then drain the tub while inspecting the waste connections below the floor for leaks. Access from below will be necessary for this step. Run a bead of tub and tile caulk around the bottom edge of the bathtub where it meets the floor. Wipe off any excess caulk with a wet cloth.